Disclaimer
© Ericsson AB 2026.
All rights reserved. The information in this document is the property of Ericsson. Except as specifically authorized in writing by Ericsson, the receiver of this document shall keep the information contained herein confidential and shall protect the same in whole or in part from disclosure and dissemination to third parties. Disclosure and disseminations to the receiver's employees shall only be made on a strict need to know basis. The information in this document is subject to change without notice and Ericsson assumes no liability for any error or damage of any kind resulting from use of the information.
Trademarks
- Google, Google Cloud, Google Cloud Platform, GCP, and GKE are trademarks of Google LLC.
- Microsoft, Entra, Azure are trademarks of the Microsoft group of companies.
- Amazon Web Services and Amazon Cognito are trademarks of Amazon.com, Inc. or its affiliates in the United States and/or other countries.
- 3GPP is a trademark of ETSI registered for the benefit of its members and of the 3GPP Organizational Partners.
Start your onboarding
This resource helps you prepare for onboarding to the Ericsson On‑Demand portal. To ensure a successful Day‑0 onboarding, complete these prerequisites:
- Setup Google Cloud account
- Configure identity provider
- Request offer via Google Cloud Marketplace
See the following sections for step‑by‑step details.
To set up Google Cloud account
Note: To accept a private offer for Core On-Demand services you must have a Google Cloud business and billing account.
Recommendation: Use Google Workspace tools or Cloud identity for managed access.
- Navigate to https://cloud.google.com/ and click Get started for free.
- Enter your corporate email address to sign-in or create an account.
- Enter credit card information.
- Set up billing account administrator See the figure below.
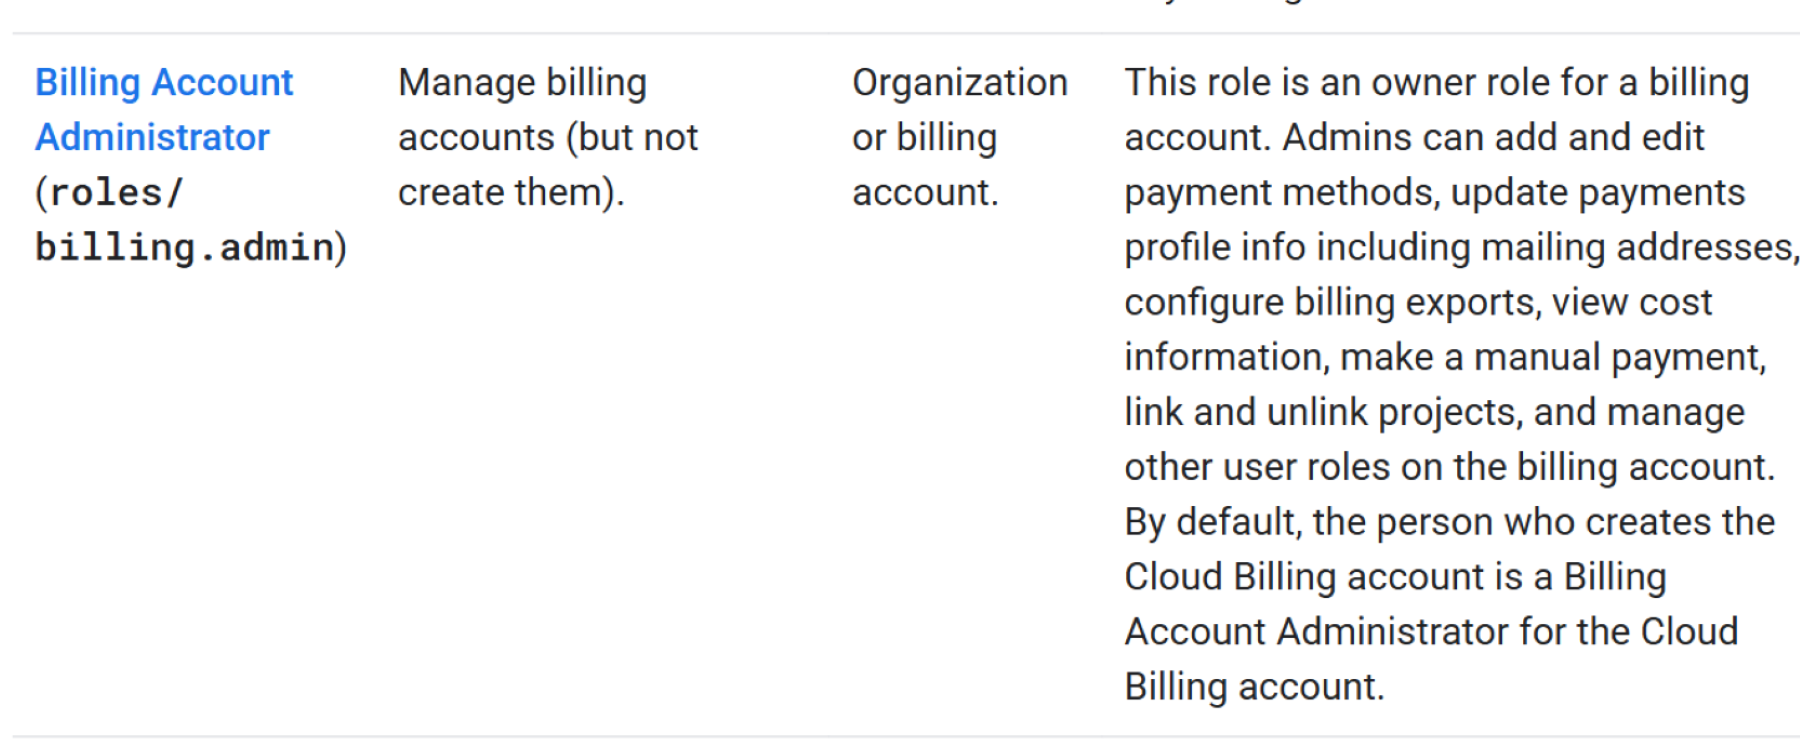
Figure 1 – Cloud billing roles in IAM
See Access control with IAM for more details.
With your Google Cloud account configured, proceed to the IdP prerequisites to set up identity federation, token claims, and group-to-role mappings.
Identity provider (IdP) prerequisites and setup
On-Demand allows customers to use their existing IdP by federating it with our service. Completing the recommended prerequisites below ensures correct authentication, user-to-role mapping, and token claim provisioning.
The following “Preparing your IdP” section outlines 4 key preparation areas, followed by step-by-step checklists for the 2 most commonly used IdPs - Microsoft Entra ID (Azure AD) and Amazon Cognito platforms.
Preparing your IdP
User groups
- Ensure groups exist in your IdP for mapping to On-Demand roles/permissions.
- Confirm users are members of these groups.
- Groups must be included in the OIDC token under the groups
User directory
- Verify the authoritative user store contains representative users for onboarding.
- Include at least one admin and one regular user.
Federation & OIDC token configuration
- On-Demand consumes standard OIDC ID tokens (JSON web tokens) containing identity and authorization information.
- Required non-standard claim: groups.
- Include subject identifier, email/username, and group/role claims.
IDP details and OIDC metadata
- Provide required details: client ID, client secret, IdP domain name, authentication URL, token URL, userinfo URL, and issuer URL.
- Retrieve metadata from your IdP’s “well-known” endpoint.
Step-by-step checklist
Microsoft Entra ID (Azure AD) platform
1. Application registration
- Register application for On-Demand.
- Record client ID and client secret (create secret separately).
- Ensure OIDC support is enabled on the app.
2. User groups
- Create groups for service role mapping.
- Add admin and regular user(s) to each group.
3. Token configuration
- Enable “Group Claims” in token settings.
- If group claims overflow, groups may be fetched via Microsoft Graph API—inform us in advance.
4. OIDC metadata
- Capture “.well-known” metadata URL for the tenant.
5. Consent and API Permissions
- Enable Group.Read.All and email permissions.
- Provide admin consent where required.
Amazon Cognito platform
1. User Pool
- Create user pool for Ericsson On-Demand.
- Create user accounts.
2. App Client
- Create app client with the following enabled:
- Authorization Code flow
- Proof Key for Code Exchange (PKCE)
- Scopes: openid, email
3. Groups
- Create groups for role mapping.
- Add admin and regular user(s) to each.
4. Configure Pre-Token Generation Function
- Configure a pre-token generation trigger to map Amazon Cognito default claim name from "cognito:groups" to "groups" in the ID token.
5. OIDC Metadata
- Gather/capture .well-known metadata URL for the tenant.
After completing the above IdP setup, proceed to obtain Core On-Demand by requesting and accepting a private offer in Google Cloud Marketplace followed by Day 0 onboarding.
Google Cloud Marketplace – Private offer and Day 0
This section details how to request, receive, and accept a private offer for Core On-Demand for private wireless through Google Cloud Marketplace, and how to complete Day 0 onboarding.
To request and accept a private offer
1. Locate Ericsson On-Demand in Google Cloud Marketplace
- Navigate to Google Cloud Marketplace and search for Ericsson.
- Select Core On-Demand for Private Wireless from the search results.
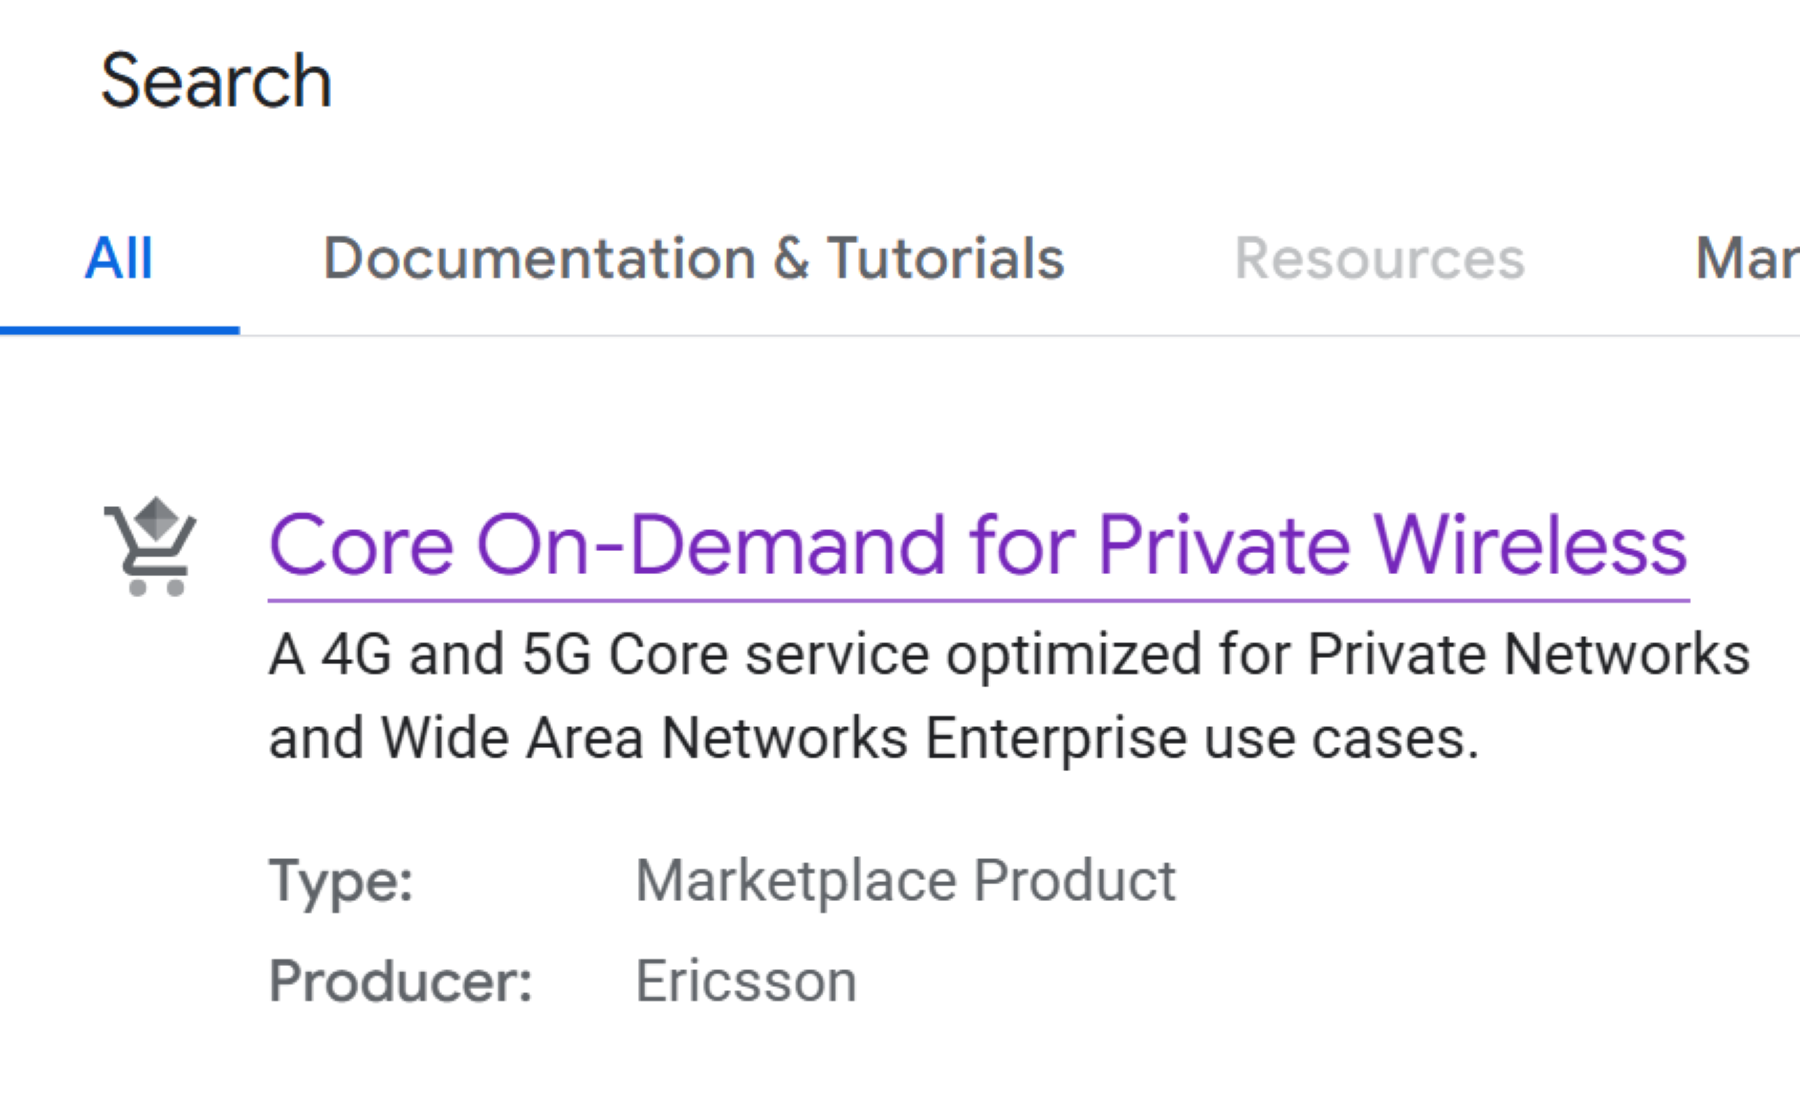
Figure 2 – Core On-Demand Listing in Google Cloud Marketplace
2. Initiate private offer request
- Click the Contact Sales on the product details page.
- Enter your details such as full name, company name, and contact email address in the resulting popup window.
- Click the Send Email button to submit the request.
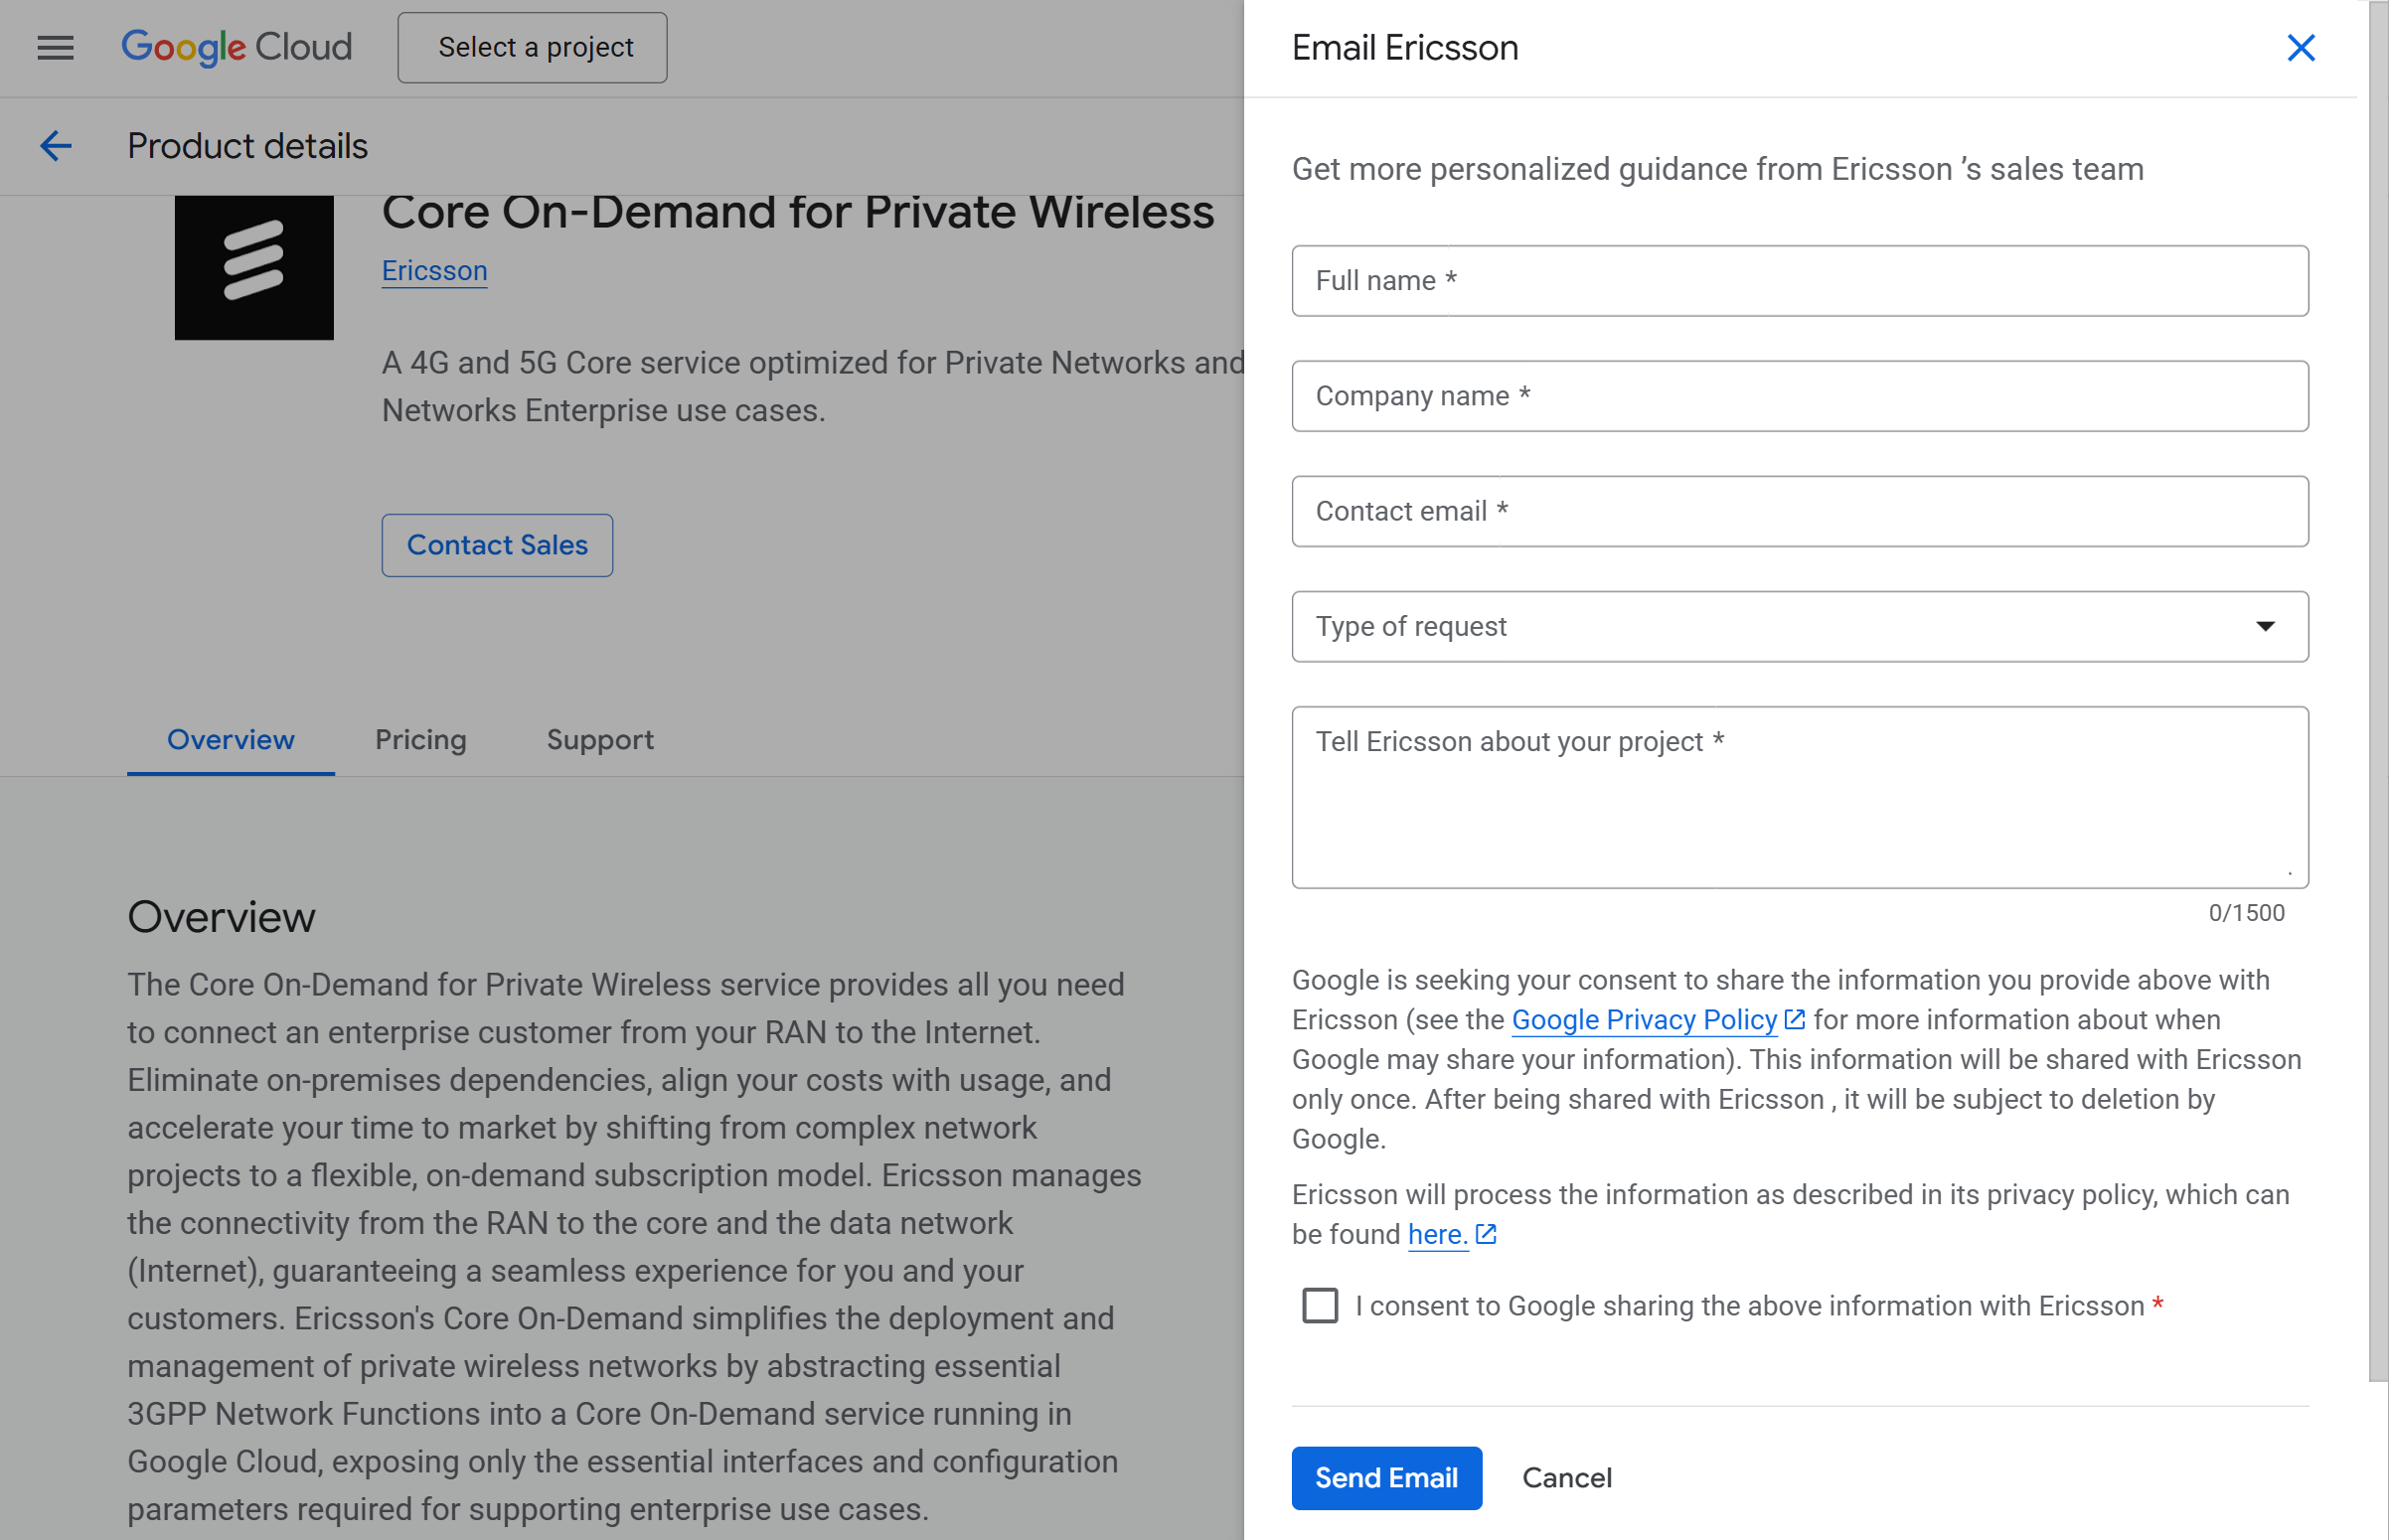
Figure 3 - Email Ericsson
3. Accept your private offer
- Open the link to your private offer sent to the email address entered in the step above.
Note: This link will redirect to the Google Cloud Marketplace. - Review your private offer – purchase policy and terms.
- Accept your private offer.
Note: Ensure the user receiving the private offer has the right role to accept the offer. See Google Cloud documentation for details.
4. Sign up with Ericsson On-Demand
- Click on the Sign Up with Ericsson On-Demand option to launch the On-Demand portal.
To start Day 0 onboarding
Pre-requisites
- Prepare an IdP group to be mapped to the EOD “Role Administrator” role.
- Gather the following IdP values before configuring identity federation:
- Client Id (also called Client Application ID or App ID)
- Client Secret (also called Client Application Secret or App Secret)
- Issuer URL (Identifier)
- Authorization Endpoint URL
- Token Endpoint URL
- User Info Endpoint URL
Follow these 4 steps in sequence
1. Click Begin to open the Fill in your company details section.
- Enter the details.
- Click Save.
2. Click Begin to open the Activate federated authentication section.
- Enter the details.
- Click Save.
3. Click Begin to open the Set-up role administrators section.
- Enter the details.
- Click Save.
4. Click Begin to open the Set-up role administrators section.
- Select the I understand checkbox.
- Click Complete onboarding.
Congratulations! You have completed Day 0 onboarding.
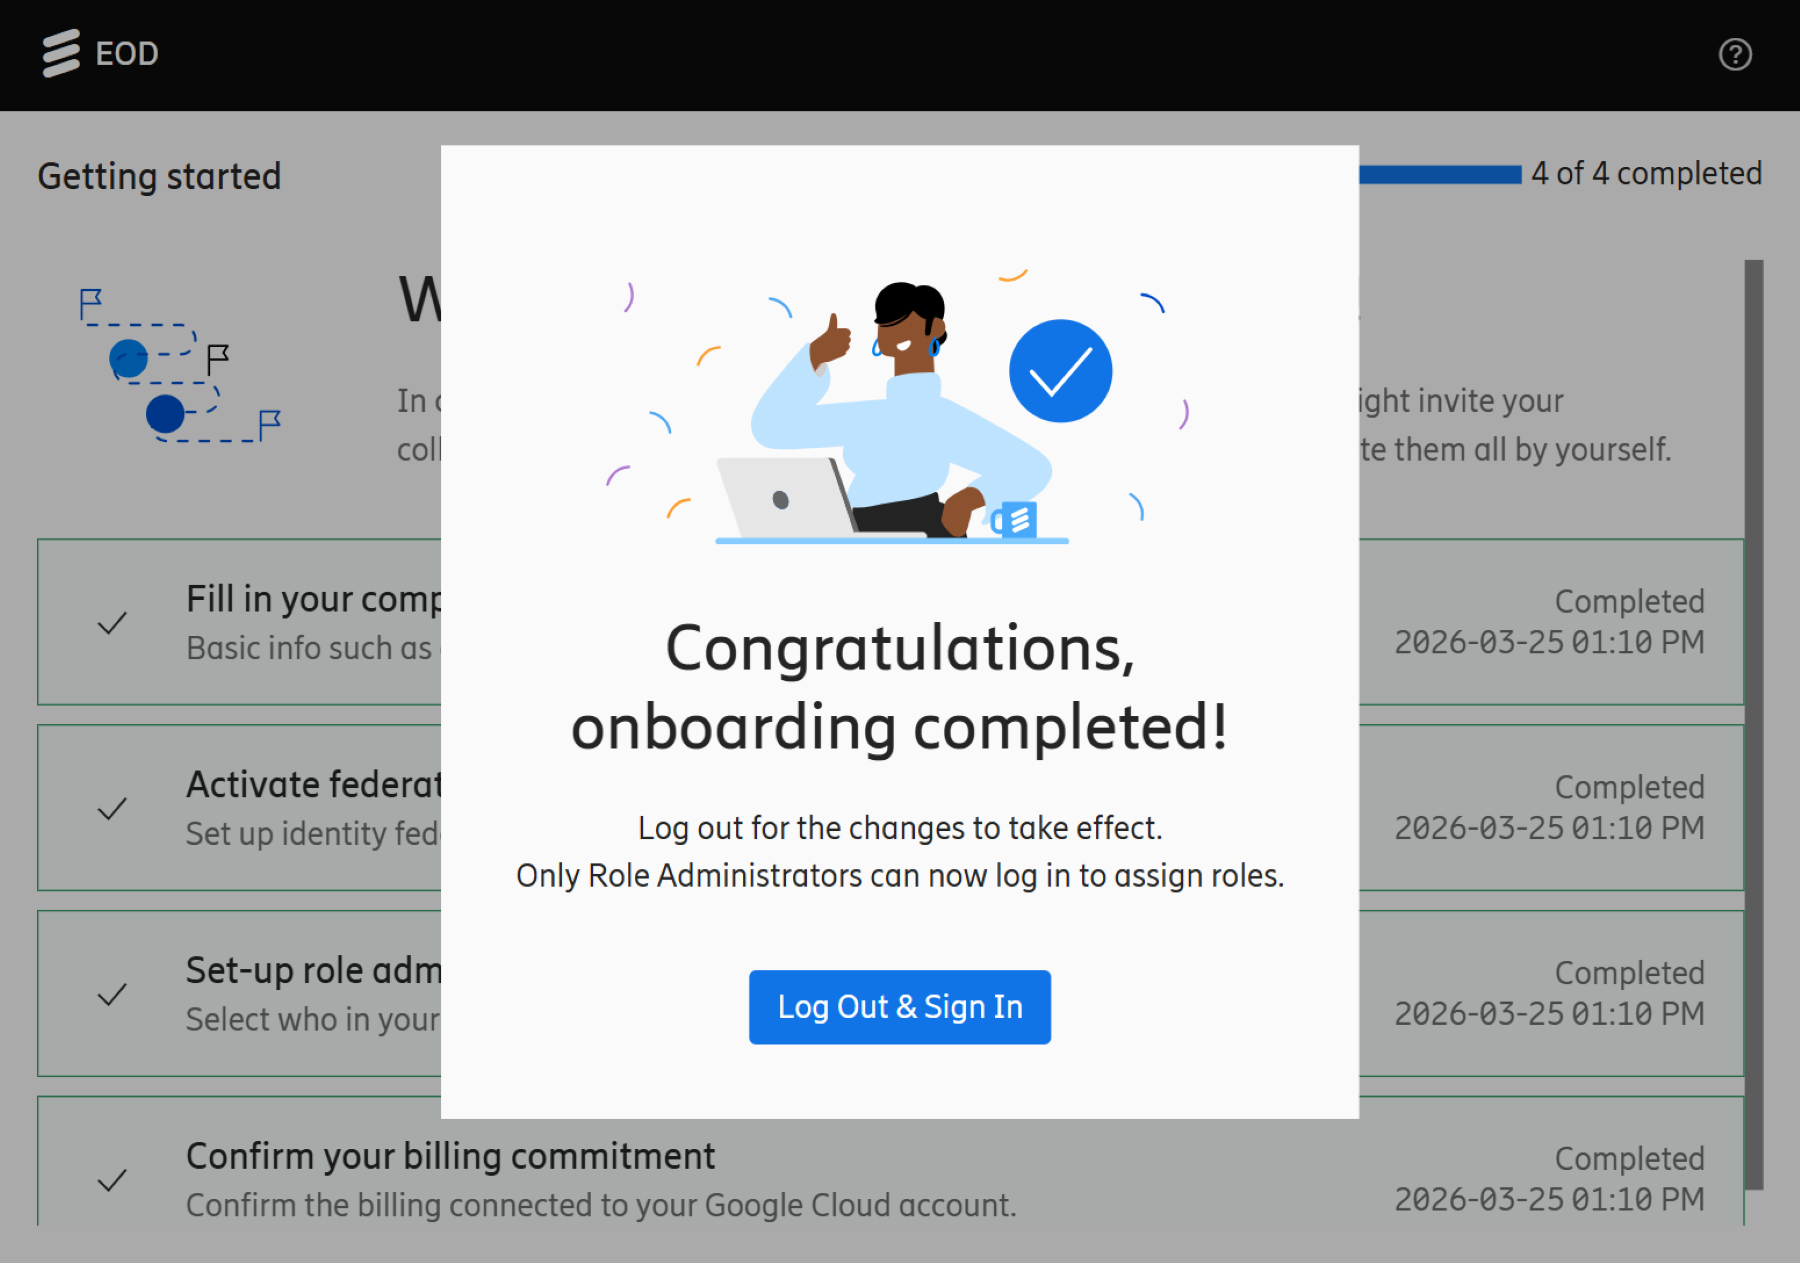
Figure 4 – Completed onboarding
Note: Click Log Out & Sign In for the changes to take effect.
Support
Reach out to Support or Sales if you encounter issues.